3. Understanding Shards
The data Shards are horizontal partitions of data that are stored on assorted devices. Creating Shards is a means of splitting the data and storing it across multiple locations by logically separating the data to ensure that the data is always accessed from the correct location. Since the Shards are spread around on multiple devices, chunks are created to determine which device stores what individual data Shard. This section provides information for working with the data Shards.
3.1. Working with Shards
Shards can be viewed by different groups, new Shards can be added, and they can be exported.
3.1.1. Viewing the Shards Dashboard
In order to access and work with the Shards Dashboard, follow the steps below:
On the navigation panel, click on
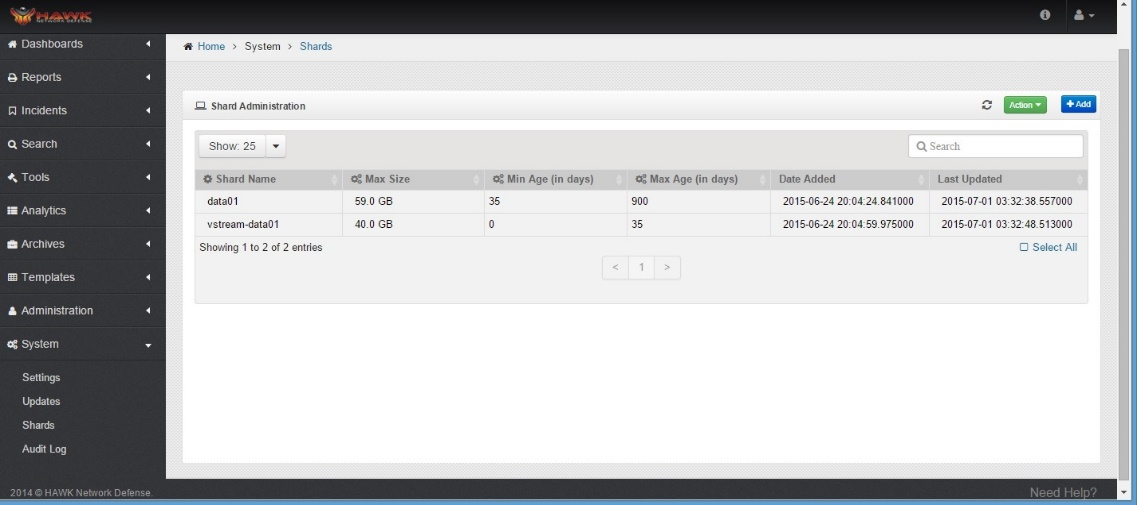
The Shards and Usage Dashboard opens, as shown:
The Shards Administration panel provides the following information:
Shard Name - Shows the name of the Shard.
Max Size - Shows the maximum size of the Shard.
Min Age - Displays the minimum number of days for data to be retained on the Shard.
Max Age - Displays the maximum number of days for data to be retained on the Shard.
Date Added - Displays the date that the Shard was added to the system.
Last Updated - Shows the last date that data was added to the Shard.
3.2. Managing Shards
There are a variety of activities that can be performed for each Shard. New Shards can be added, the existing Shards can be exported and the data in the Shards shown can be refreshed. This section shows the activities that can be performed on each Shard.
3.2.1. Adding Shards
New Shards can be created at any time by performing these steps:
On the navigation panel, click on
To add a new Shard, in the Shard Administration panel, click on the button.
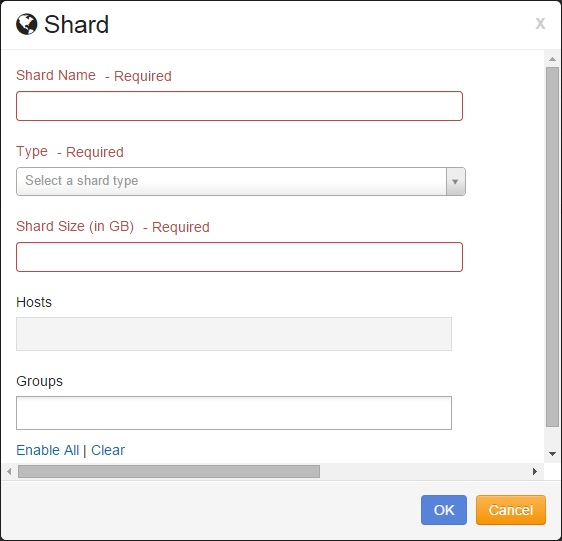
The Shard Editor window opens.
Enter the Name of the Shard. (This is a required field)
The next field is the Type, which is a required field.
This field determines if the shard is “Tier 1 V-Stream” or “Tier 2 Datastore”
The next field is the Minimum Age Limit (in days).
Type in the number of days for the minimum age of the data stored in the shards.
Note
If Tier 1 V-Stream type system will default to 0.
The next field is the Maximum Age Limit (in days).
Type in the number of days for the maximum age of the data stored in the Shards.
Next, enter the Shard Size (in GB).
Enter the size of the Shard by typing the size in the field.
The Hosts will automatically filled out by the system after it connects.
Select the Groups to which the Shard is assigned.
Note
To select all the groups you can click ‘Enable All’ and all the groups will be added. Click clear to clear the selection.
Click on the button to add the shard.
The notification dialog displays to indicate that the new Shard was successfully added.
Note
Remember when creating the new Shard, authentication must also be enabled.
3.2.2. Exporting Shards
If Shards need to be exported, follow these steps:
On the navigation panel, click on
Select one or more Shards in the Shard Administration panel.
Click on .
The Notification pop up opens to indicate successful export of Shard.


