9. Understanding Scores
Scores are used to determine the weight and importance that is applied to the threat. There are assorted weights that are applied based on criticality of the asset, importance of the data, and weight of the threat.
9.1. Working with Scores
There are a variety of activities that can be accomplished and worked with on the Scores, such as creating new Scores, defining the Rules, exporting, importing, moving, and deleting the scores and rules.
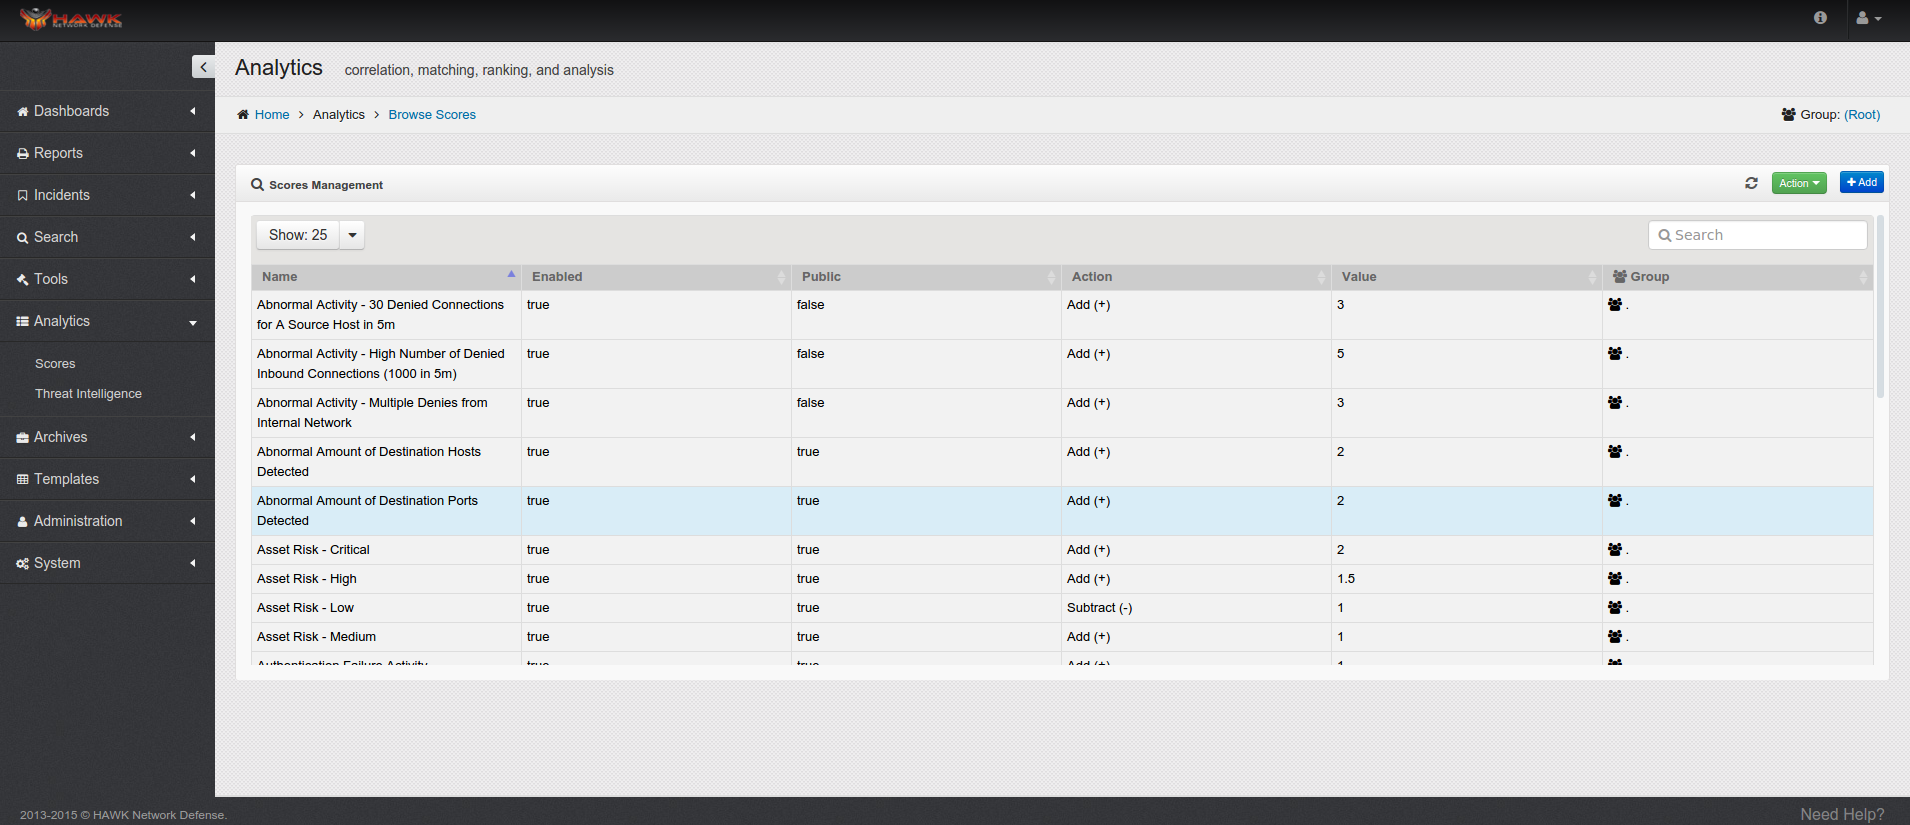
9.1.1. Viewing the Scores Dashboard
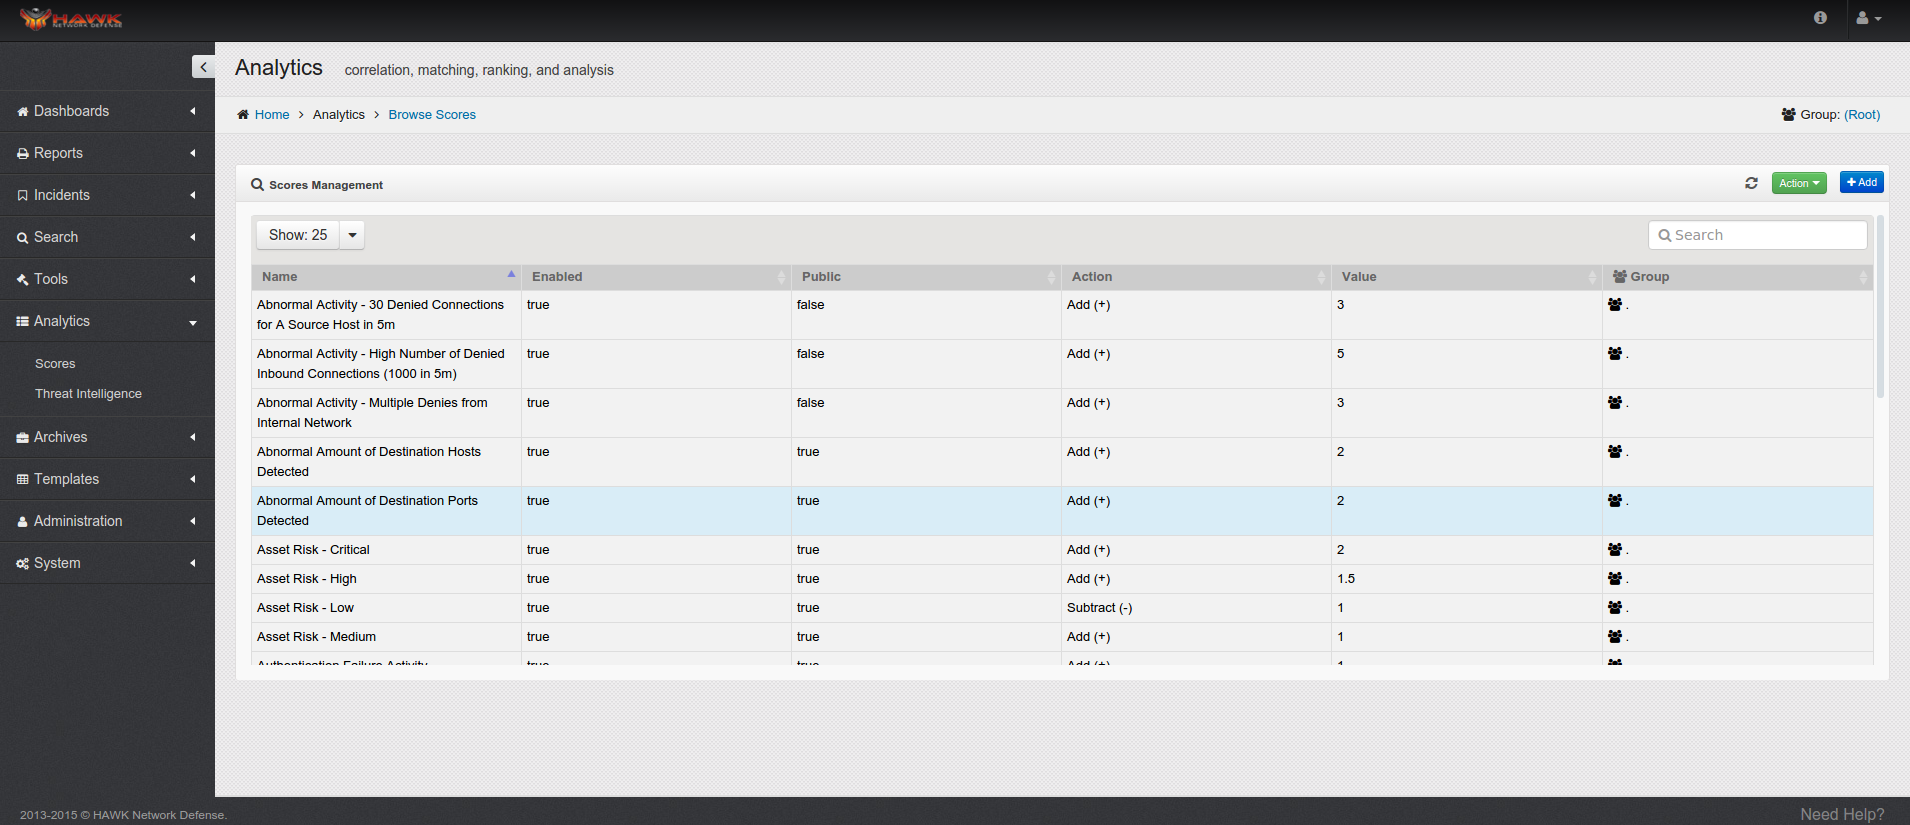
In order to view the Dashboard for the Scores, follow these steps:
To access the Scores, Click on .
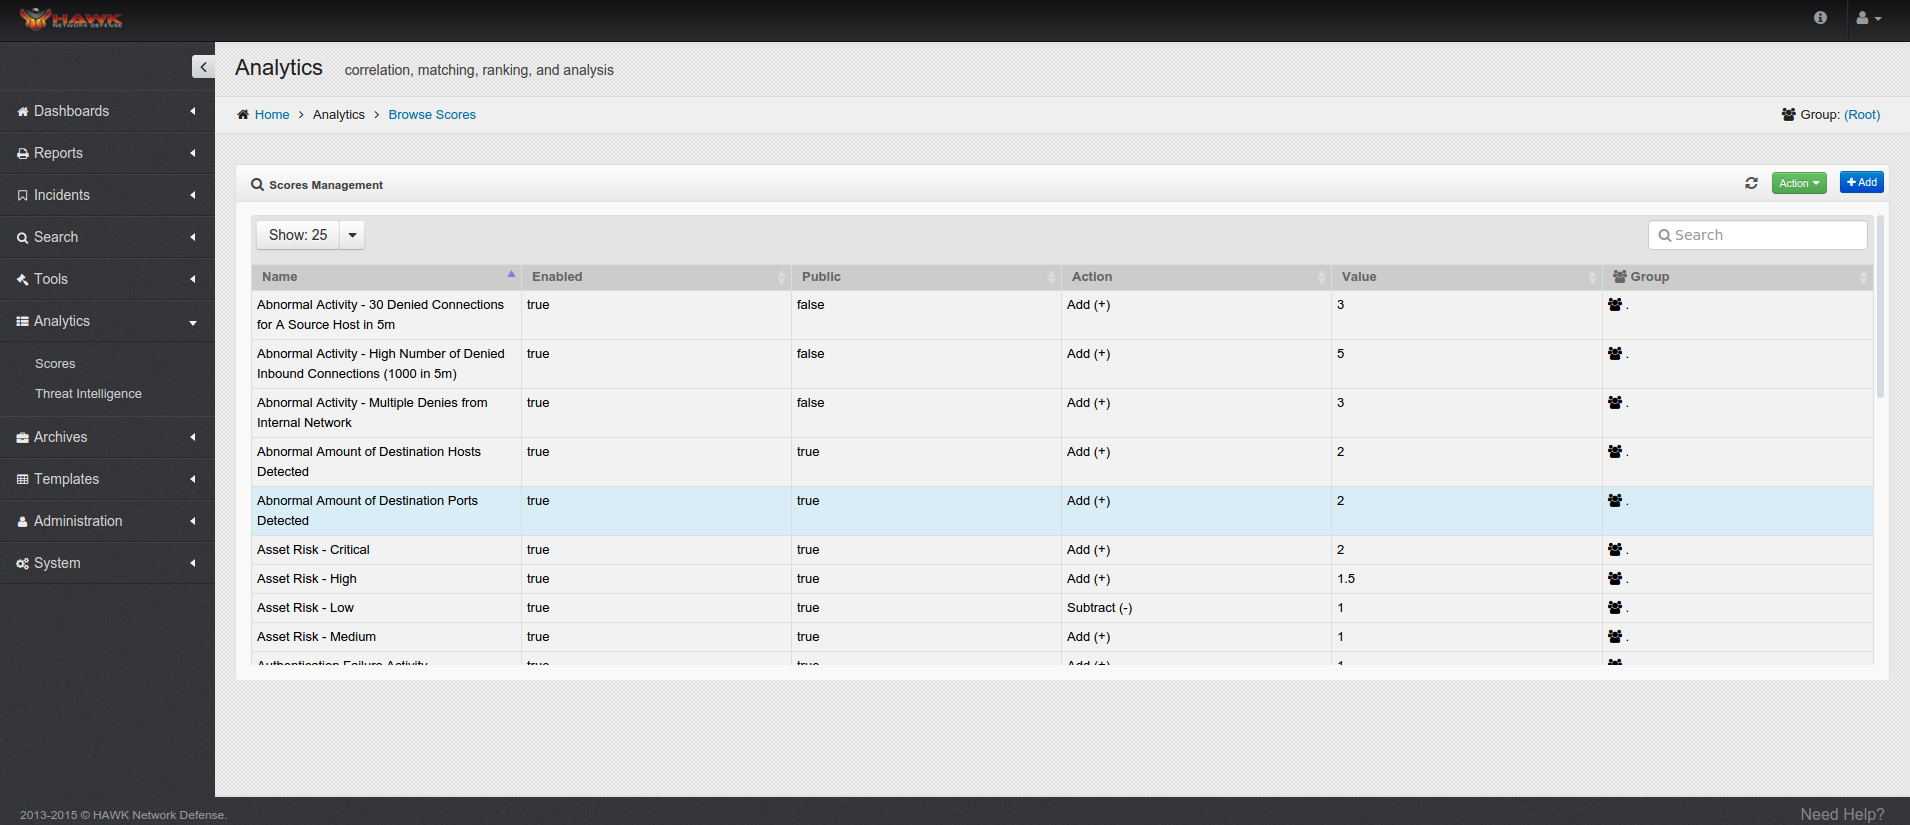
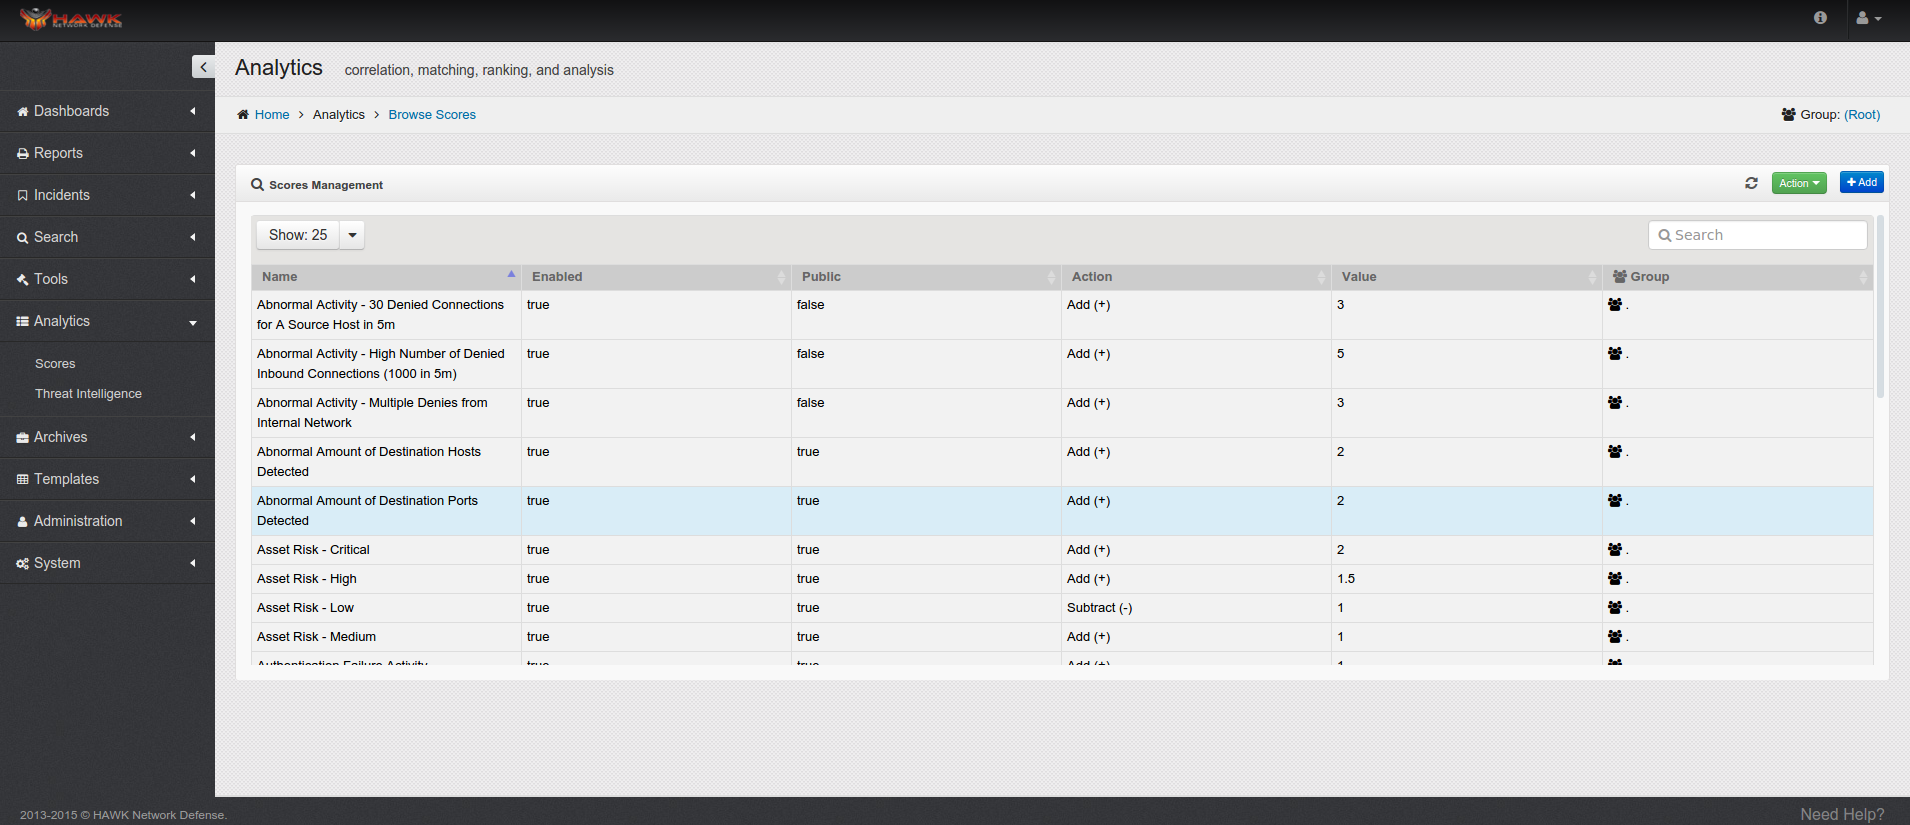
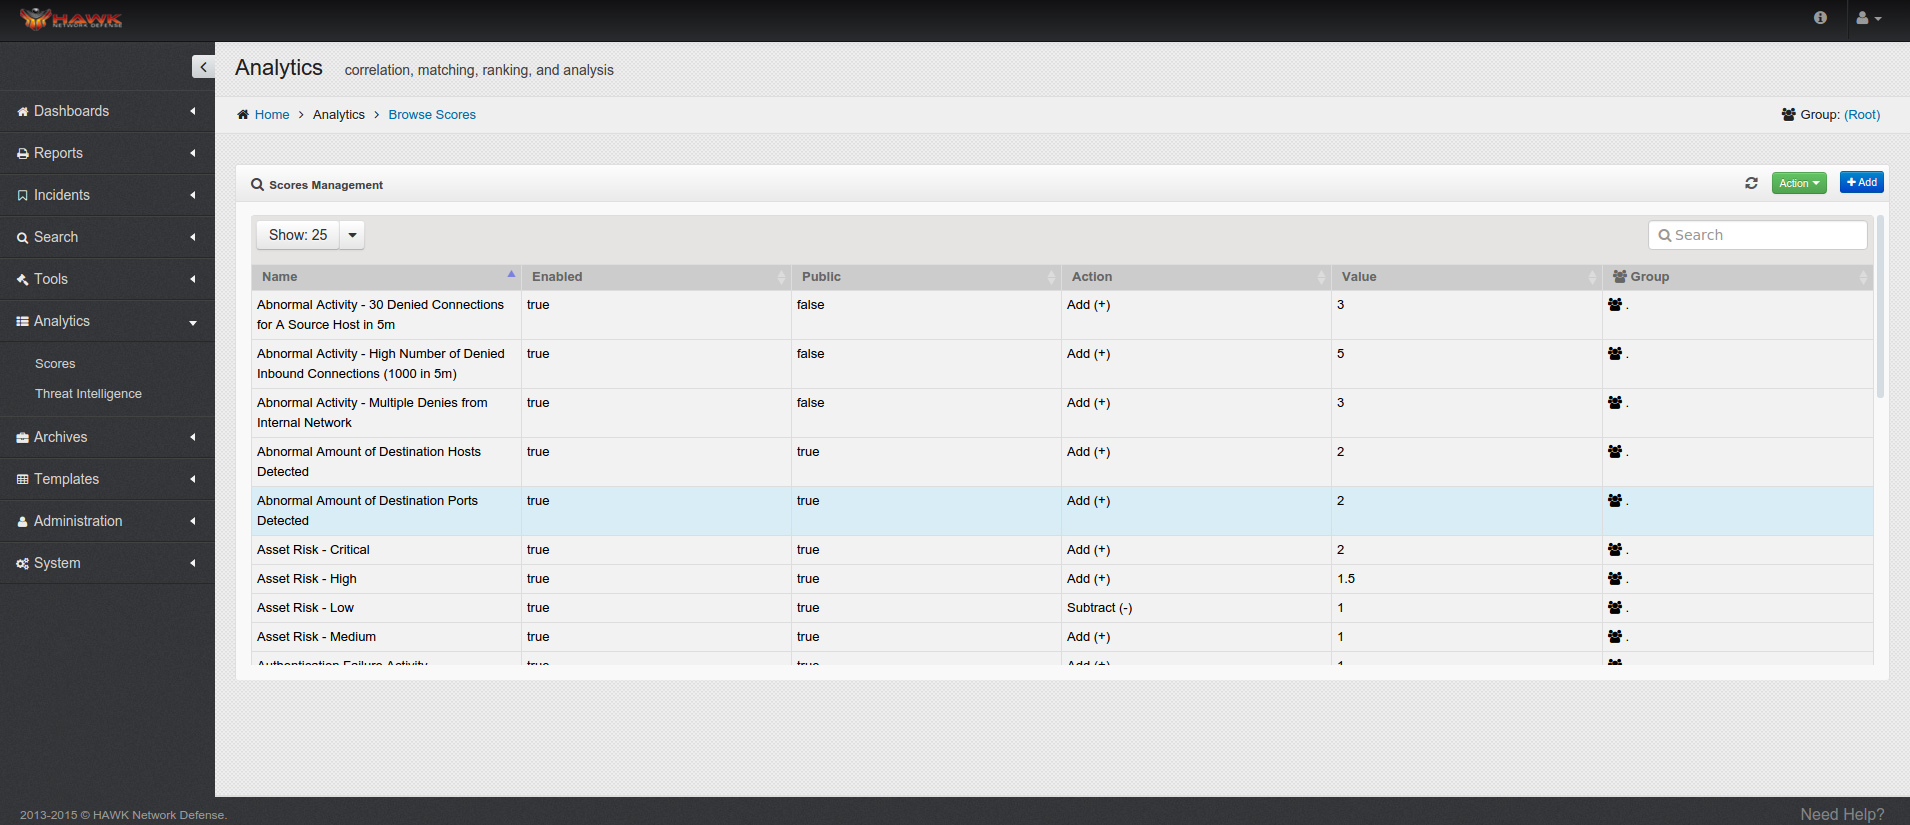
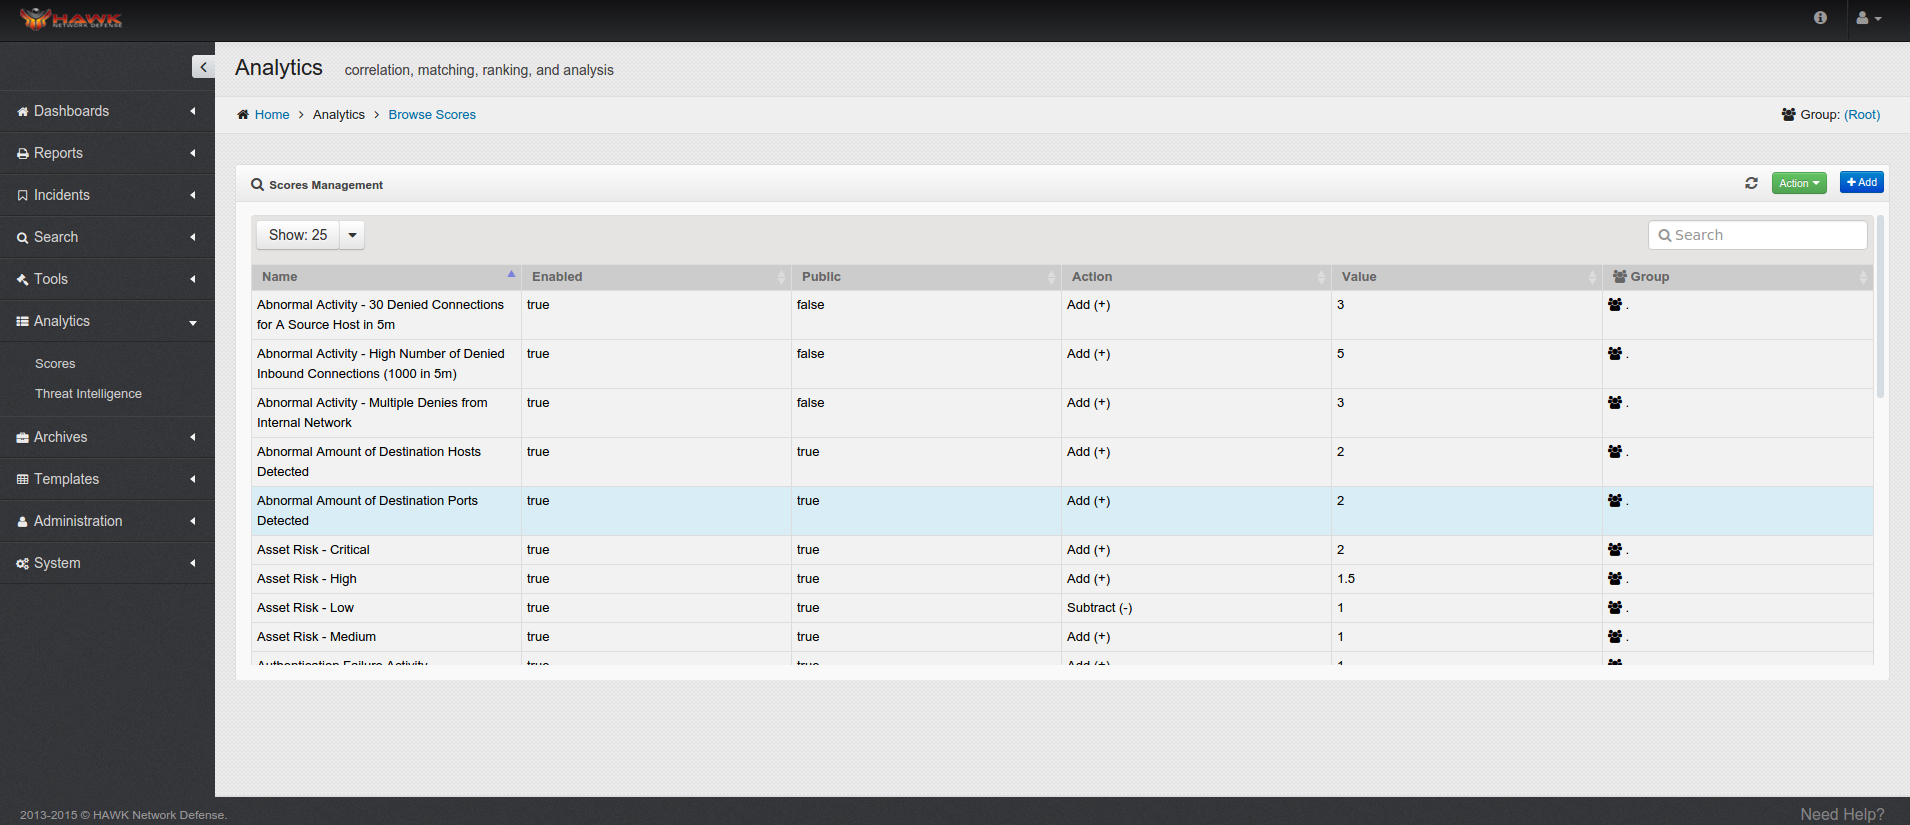
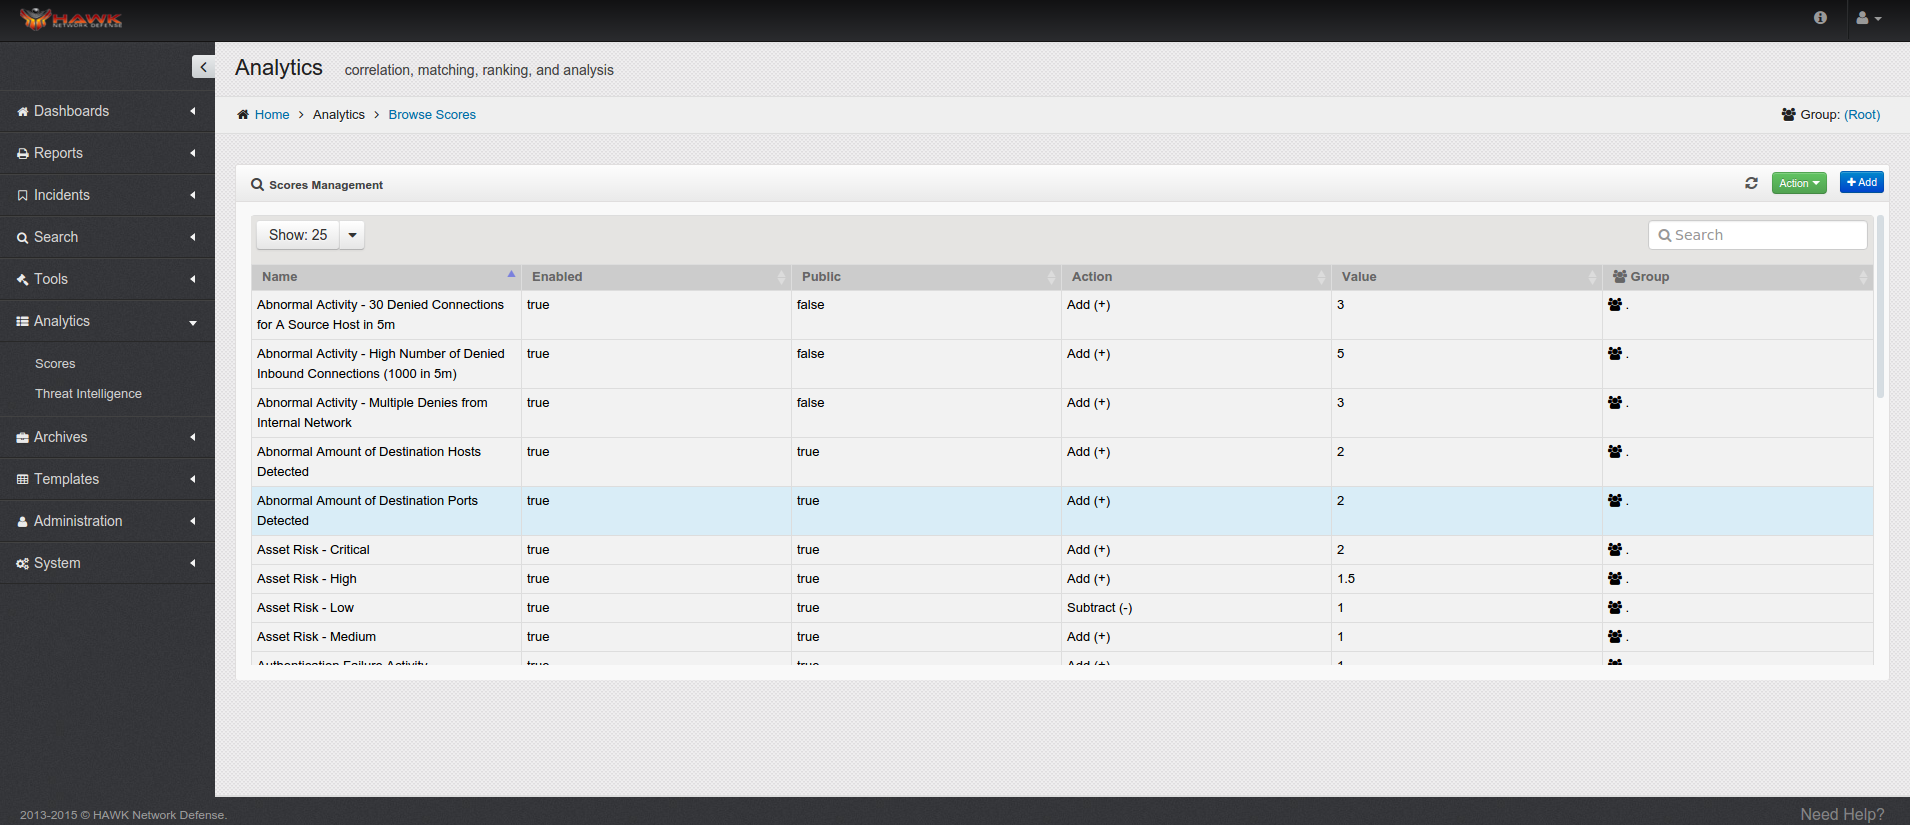
The Scores Management section shows the following information about the Scores:
Name
Enabled
Puablic
Action
Value
Group
9.1.2. Change the Group on the Scores Dashboard
When an analyst is working with the Scores for different customers or Groups, they can select a different Group by following these steps:
To access the Scores Dashboard, Click on .
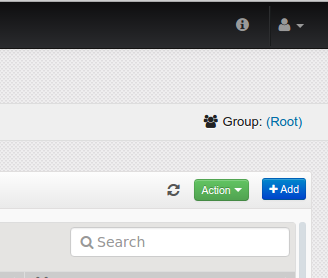
On the top right side of the Scores Management window, Click on the Group link. (In this example, the Group is (Root).)
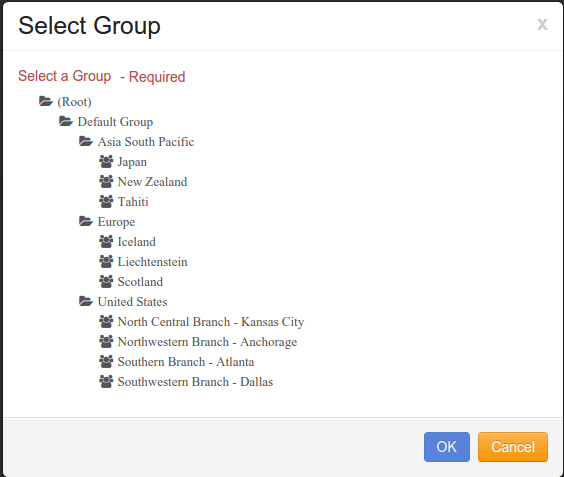
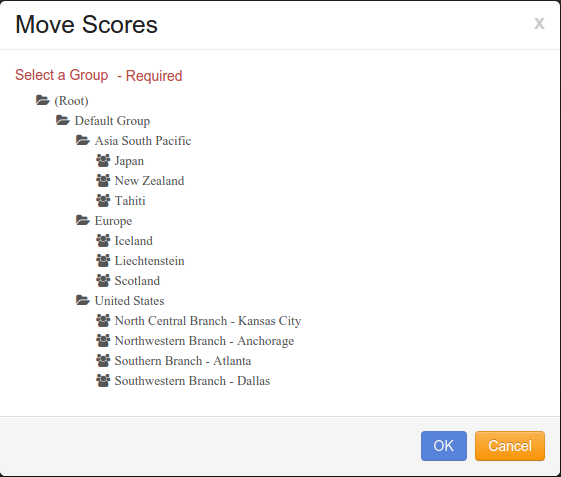
The “Select Group” window opens.
Click on the desired group.
CLick on the button and the selected Group is changed on the Scores Management window. The information displayed reflects the data in the selected Group.
9.2. Managing Scores
There are a variety of activities that can be performed on the Scores, including defining new Scores, exporting and importing data into and out of the Dashboard, and deleting the Scores. This section provides the steps to perform each of these functions.
9.2.1. Creating New Scores
If new Scores are needed, perform the following steps:
To access the Scores Dashboard, Click on .
Click on the button.
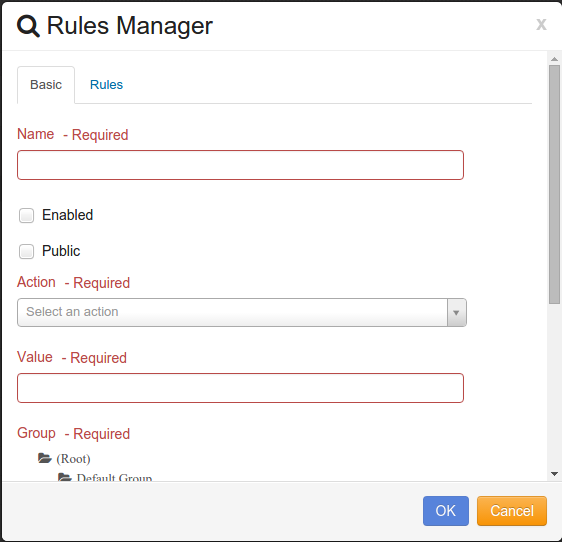
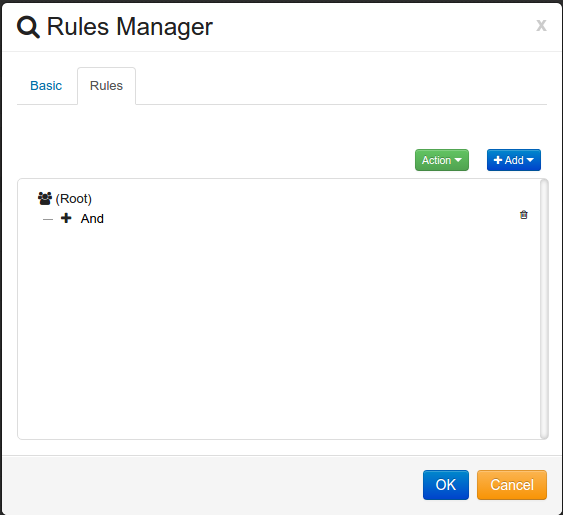
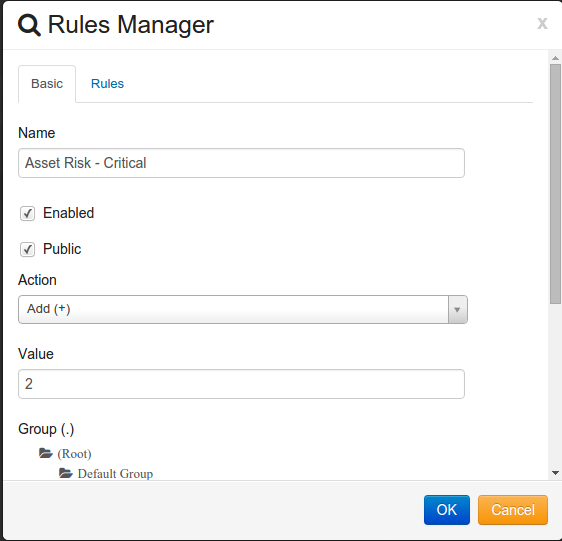
The “Rules Manager” window opens in the tab, as shown:
Enter the name of the new Score being created in the Name field.
To activate the Score to be used, check the box next to Enabled
To allow other authorized users in the Group to use the Score, click on the checkbox next to Public. To make the rule Private leave the checkbox next to Public unchecked.
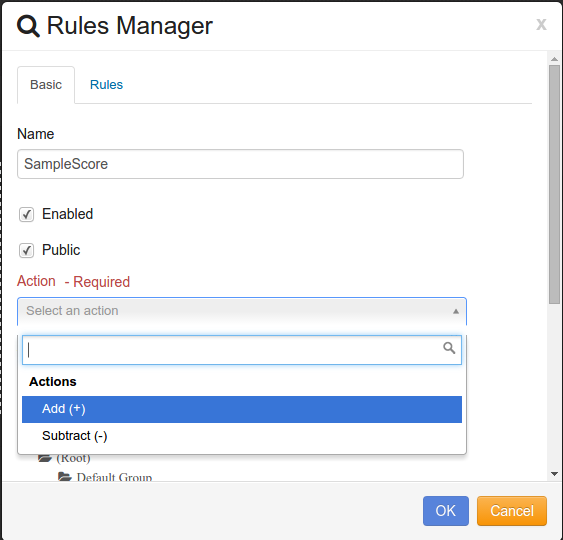
Click on the Action drop-down arrow and select either Add (+) or Subtract (-) to select the Action.
Adding ensures that when the specified activity meets the criteria for the rule, the value selected is added to the weight of the event.
Subtracting ensures that when the specified activity meets the criteria for the rule, the value selected is subtracted from the weight to decrease the value of the event.
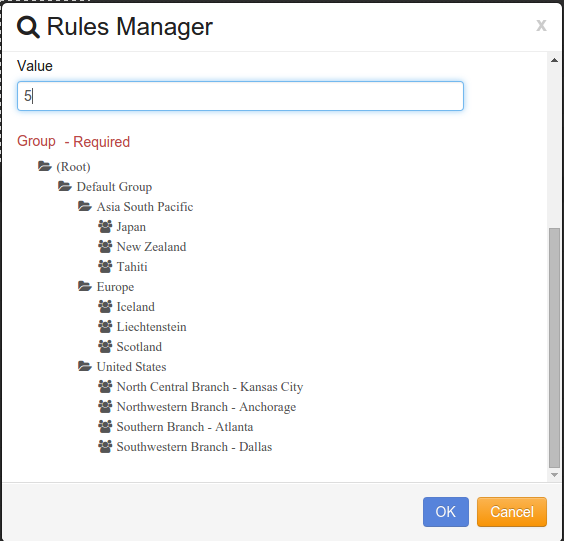
Enter the value for the new Score. This identifies the quantity that is either added or subtracted from the weight of the event when the activity matches the rule set for this Score.
Select the Group for the new Score.
The next step is to click on the tab.
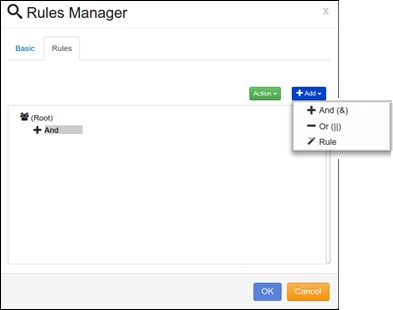
Click on the button.
Select “Add(&)” to set an “Add Operator” to the Rule.
Select “Or(||)” to set an “Or Operator” to the Rule.
Select “Rule” to add a Rule.
Note
The top item should be an And. So your first choice should be a Rule.
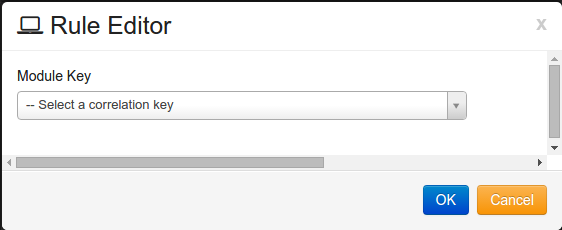
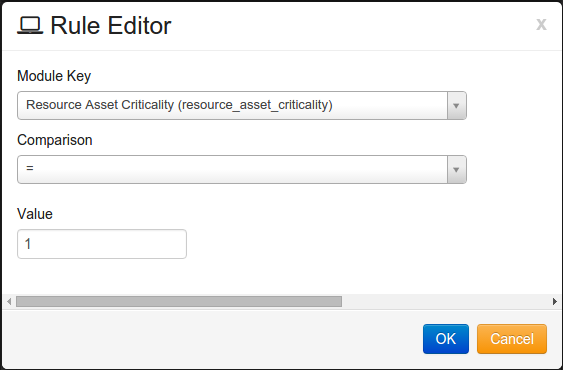
If you choose . The “Rules Editor” window opens.
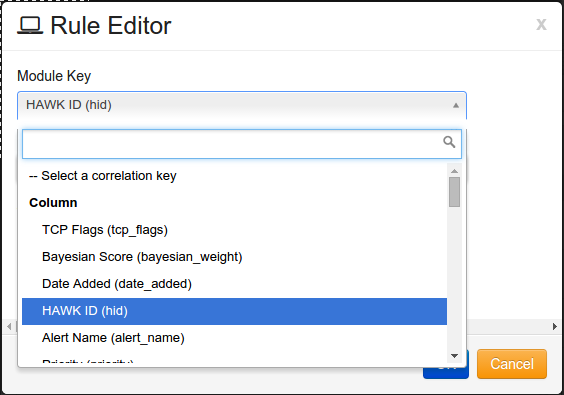
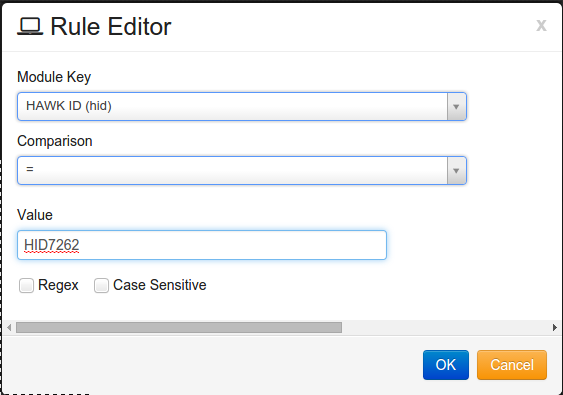
Click on the drop-down arrow for the Module Key, and select a Correlation Key or Function.
Some of the options for correlation keys are:
HAWK ID
Alert Name
Alert Category
Resource Name
Bayesian Score
All event columns can be used. For a complete list see Available Event Columns in the Reference Guide .
In addition to column names there are fuctions as shown below:
Stream Counter
Distinct Stream Counter
RBLDNS Blacklist Lookup
Timestamp - Day of Week
Timestamp - Hour and Minute
Vulnerability Threshold Analysis
Inter-Column Comparison
Host Lookup List
If a column name was chosen as a Correlation key. The next step is to select the Comparison operator, which are:
<= (Less than or equal to)
< (Less than)
= (Equal to)
!= (Not equal to)
>= (Greater than or equal to)
> (Greater than)
Once the Comparison is entered, a corresponding Value must be entered as well in the Value field.
Note
Some Module Keys will have the option for Regex and Case Sensitive. When checking the Regex box the Value should be a Regular Expression. If Case Sensitive is checked the value will only match if the case is the same. Default value is case insensitive.
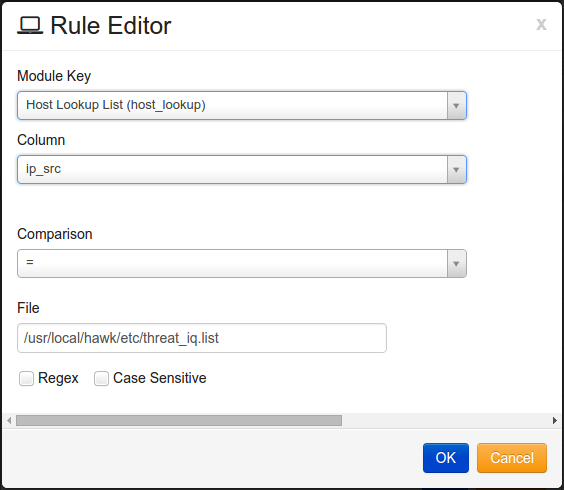
If a function was used as a correlation key you will have to fill in each provided field for that specific function. In this example, using ‘Host Lookup List’
First, select a column that you will compare against.
Second, select a comparison, in this example ‘Equals To (=)’.
Last, Enter the location to the file to compare the column against.
Note
Each function will have it’s specific filelds that will need to be filled out.
When all the values are entered, click on the button to add the new rule. To cancel adding the new Rule, Click on the button.
When all rules have been entered, click on the button to add the new Score. To cancel adding the new Score, Click on the button.
When the new Score is added it is now displayed in the Scores Manager.
9.2.2. Updating Scores
The Scores can be updated at any time by following these steps:
To access the Scores Dashboard, Click on .
Double click on the score you want to change, to bring up the Rules Manager.
The Rules manager opens to display the defined values for the Rule.
Click on the fields to change the value for the Rule, as needed, on the Basic tab. This includes the following:
Name
Action
Value
Group
Click on the tab.
Double-click on the desired Rule to update or click to add a new rule, or add a logical operator.
The “Rule Editor” window opens.
Select the desired values to change.
Click on the button to save the changes or click on the button to cancel the changes.
When all rules have been entered, click on the button to save the Score. To cancel the changes to the Score, Click on the button.
The changes are now updated.
9.2.3. Moving a Score or Scores to Another Group
The Scores can be moved to another Group at any time by following these steps:
To access the Scores Dashboard, Click on .
Click on the Score or Scores to move.
Click on .
The “Select Group” window will open.
Select the group you want to move your score(s) to.
Click button to save your changes.
9.2.4. Cloning Scores
The Scores can be cloned by doing the following:
To access the Scores Dashboard, Click on .
Click on the Score or Scores to clone.
Click on .
The notification dialog opens to indicate that the selected Score(s) is to be cloned.
Click the button to cancel the clone operation. Click the button to clone the Scores.
The new score will show in the Score Dashboard with “-clone” at the end of the name.
9.2.5. Exporting Scores
The Scores can be exported at any time by following these steps:
To access the Scores Dashboard, Click on .
Select the score or scores you want to export.
Click on .
The notification dialog opens to indicate that the selected Score(s) is being exported.
Note
Your browser may download the csv file to its default directory or may ask you for a location to download the file.
9.2.6. Importing Scores
The Scores can be imported at any time by following these steps.
To access the Scores Dashboard, Click on .
Navigate to the desired group to which you want the scores to be imported into.
Click on .
The “Choose File to Upload” window opens.
Click on the desired file to import.
Click on the “Open” button.
The selected file is imported into the Scores.
9.2.7. Deleting a Score or Scores
If a Scores is no longer needed, it can be deleted at any time by following these steps:
To access the Scores Dashboard, Click on .
Select the score or scores you want to delete.
Click on .
The delete confirmation dialog opens to confirm that the correct Score or Scores to be deleted are selected. Click on ‘Yes’ to confirm. To cancel the delete, click on the ‘No’ button.
9.3. Creating Custom Scores
For more information on how to create custom scores please see How To Create Custom Scores Section
